Bare Metal Forms and Helpers Walkthrough
09 May 2014Estimated time: 2-3 hours
Course: Ruby on Rails » Forms and Authentication » Project: Forms
##Objective
These projects will give you a chance to actually build some forms, both using nearly-pure HTML and then graduating to using the helper methods that Rails provides.
##Basic Steps:
First, create a basic Rails app with User Model and Controller.
From the command line, create a new Rails app:
jamies-air:~ jxberc$ rails new re-formerCreate and Migrate User Model:
jamies-air:re-former jxberc$ rails generate model User username:string email:string password:stringjamies-air:re-former jxberc$ db:migrateIn app/models/user.rb, add validations for presence:
class User < ActiveRecord::Base
  validates :username, presence: true
  validates :email, presence: true
  validates :password, presence: true
end
In config/routes.rb, create routes for #new and #create actions:
ReFormer::Application.routes.draw do
  resources :users, :only => [:new, :create]
end
In console, check to make sure routes were created:
jamies-air:re-former jxberc$ rake routes
    Prefix Verb URI Pattern         Controller#Action
user_index POST /user(.:format)     user#create
  new_user GET  /user/new(.:format) user#new
jamies-air:re-former jxberc$
Generate a UsersController:
jamies-air:re-former jxberc$ rails generate controller UsersIn app/controllers/users_controller.rb, write empty methods for #new and #create:
class UsersController < ApplicationController
  def new
  end

  def create
  end
end
In app/views/users folder, create new.html.erb file. Add boilerplate text to file.
From the command line, load development server using rails s. You should see the boilerplate text at ` http://localhost:3000/users/new`.
Build a form for creating a new user:
<form accept-charset="UTF-8" action="/users" method="post">

  <label for="username">Username:</label>
  <input id="username"  name="username" type="text"><br>

  <label for="email">e-mail:</label>
  <input id="email" name="email" type="text"><br>

  <label for="password">Password:</label>
  <input id="password" name="password" type="password"><br>

  <input type="submit" value="Submit">
</form>
If you try to submit data now you will receive an ActionController::InvalidAuthenticityToken error. Add authenticity token as follows:
<form accept-charset="UTF-8" action="/users" method="post">
  <input type="hidden" name="authenticity_token" value="<%= form_authenticity_token %>">
  ...
Now if you try to submit data, you will get a template is missing error.
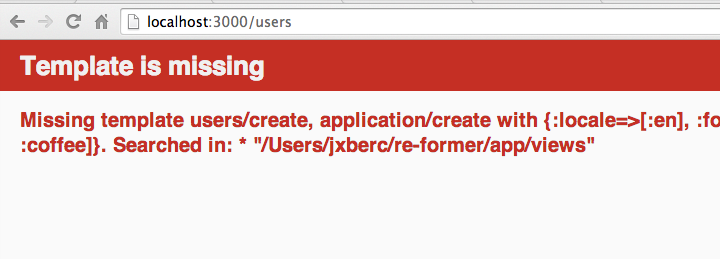
That is okay. This means we’ve reached our #create action in the controller and by default it looks for an app/views/users/create.html.erb file.
Instead, lets build the #create action to go elsewhere:
def create
  @user = User.new(:username => params[:username], :email => params[:email], :password => params[:password])
  if @user.save
    redirect_to new_user_path
  else
    render :new
  end
end
In app/controllers/users_controller.rb, create and implement a #user_params helper method:
class UsersController < ApplicationController
  ...
  private

  def user_params
    params.require(:user).permit(:username, :email, :password)
  end
Update html form to submit hash of user parameters:
<form accept-charset="UTF-8" action="/users" method="post">
  ...
  <input id="username"  name="user[username]" type="text"><br>
  ...
  <input id="email" name="user[email]" type="text"><br>
  ...
  <input id="password" name="user[password]" type="password"><br>
  ...
  <input type="submit" value="Submit">
</form>
Update #create action with new helper method:
class UsersController < ApplicationController
  ...
  def create
    @user = User.new(user_params)
      if @user.save
        redirect_to new_user_path
      else
        render :new
      end
  end
  ...
Finally, confirm you can submit data using the form:
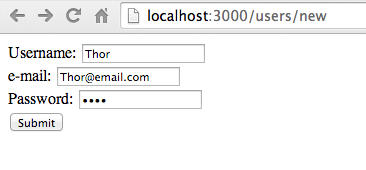
Log output:
Started POST "/users" for 127.0.0.1 at 2014-05-05 17:56:21 -0400
Processing by UsersController#create as HTML
  Parameters: {"authenticity_token"=>"vapWanzKp+ZGIdvaE1HTcwS5ybQs/6pQJyuobJOcsmM=", "user"=>{"username"=>"thor", "email"=>"thor@email.com", "password"=>"[FILTERED]"}}
   (0.1ms)  begin transaction
  SQL (0.4ms)  INSERT INTO "users" ("created_at", "email", "password", "updated_at", "username") VALUES (?, ?, ?, ?, ?)  [["created_at", Mon, 05 May 2014 21:56:21 UTC +00:00], ["email", "thor@email.com"], ["password", "thor"], ["updated_at", Mon, 05 May 2014 21:56:21 UTC +00:00], ["username", "thor"]]
   (0.6ms)  commit transaction
Redirected to http://localhost:3000/users/new
Completed 302 Found in 14ms (ActiveRecord: 2.4ms)
##Step 3: Build #form_tag Form
In this step, we will replace our html form with a #form_tag Form.
First, comment out your html form:
<!-- <form accept-charset="UTF-8" action="/users" method="post">
  <input type="hidden" name="authenticity_token" value="<%= form_authenticity_token %>">

  <label for="username">Username:</label>
  <input id="username"  name="user[username]" type="text"><br>

  <label for="email">e-mail:</label>
  <input id="email" name="user[email]" type="text"><br>

  <label for="password">Password:</label>
  <input id="password" name="user[password]" type="password"><br>

  <input type="submit" value="Submit">
</form> -->
Switch to using #form_tag and #*_tag helper methods. Note that Rails will insert authenticity token automatically.
<%= form_tag("/users", method: "post") do %>
  <%= label_tag(:username, "Username:") %>
  <%= text_field_tag(:username) %><br>

  <%= label_tag(:email, "email:") %>
  <%= text_field_tag(:email) %><br>

  <%= label_tag(:password, "password:") %>
  <%= password_field_tag(:password) %><br>

  <%= submit_tag("Submit") %>
<% end %>
In app/controllers/user_controller.rb, modify#create method to once again accept normal top level User attributes.
def create
    @user = User.new(:username => params[:username], :email => params[:email], :password => params[:password])
    #@user = User.new(user_params)
    ...
  end
Confirm you can submit data.
##Step 4: Build #form_for Form
Modify your #new action in the controller to instantiate a blank User object and store it in an instance variable called @user.
class UsersController < ApplicationController
  def new
    @user = User.new
  end
  ...
Comment out #form_tag and build #form_for form:
<!-- <%= form_tag("/users", method: "post") do %>
  <%= label_tag(:username, "Username:") %>
  <%= text_field_tag(:username) %><br>

  <%= label_tag(:email, "email:") %>
  <%= text_field_tag(:email) %><br>

  <%= label_tag(:password, "password:") %>
  <%= password_field_tag(:password) %><br>

  <%= submit_tag("Submit") %>
<% end %> -->
<%= form_for @user do |f| %>
<p>
<%= f.label :username %> <br/>
<%= f.text_field :username %>
</p>
<p>
<%= f.label :email %> <br/>
<%= f.text_field :email, :value => "example@email.com" %>
</p>
<p>
<%= f.label :password %> <br/>
<%= f.password_field :password %>
</p>
<p><%= f.submit %></p>Note: I’ve added a default placeholder value for :email.
Finally, in app/controllers/user_controller.rb, switch your controller’s #create method to accept the nested :user hash from params.
def create
    #@user = User.new(:username => params[:username], :email => params[:email], :password => params[:password])
    @user = User.new(user_params)
    ...
  end
Confirm you can submit data using the newly created #form_for form:
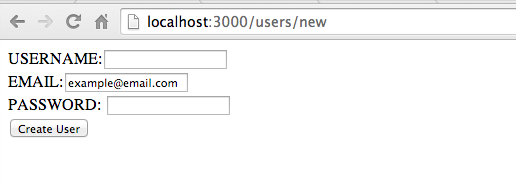
Update your routes and controller to handle editing an existing user.
In config/routes.rb:
ReFormer::Application.routes.draw do
  resources :users, :only => [:new, :create, :edit, :update]
  ...
In app/controllers/users_controller.rb:
class UsersController < ApplicationController
  ...
  def edit
    @user = User.find(params[:id])
  end

  def update
    @user = User.find(params[:id])
    if
      @user.update(user_params)
      redirect_to edit_user_path(@user)
    else
      render :edit
    end
  end
Create app/views/users/edit.html.erb. Copy/paste your form from the New view to Edit form:
<%= form_for @user do |f| %>
  USERNAME:<%= f.text_field :username %> <br />
  EMAIL:<%= f.text_field :email, :value => "example@email.com" %> <br />
  PASSWORD: <%= f.password_field :password %><br />
  <%= f.submit %>
<% end %>
“View source” on the form generated by #form_for in your Edit view.
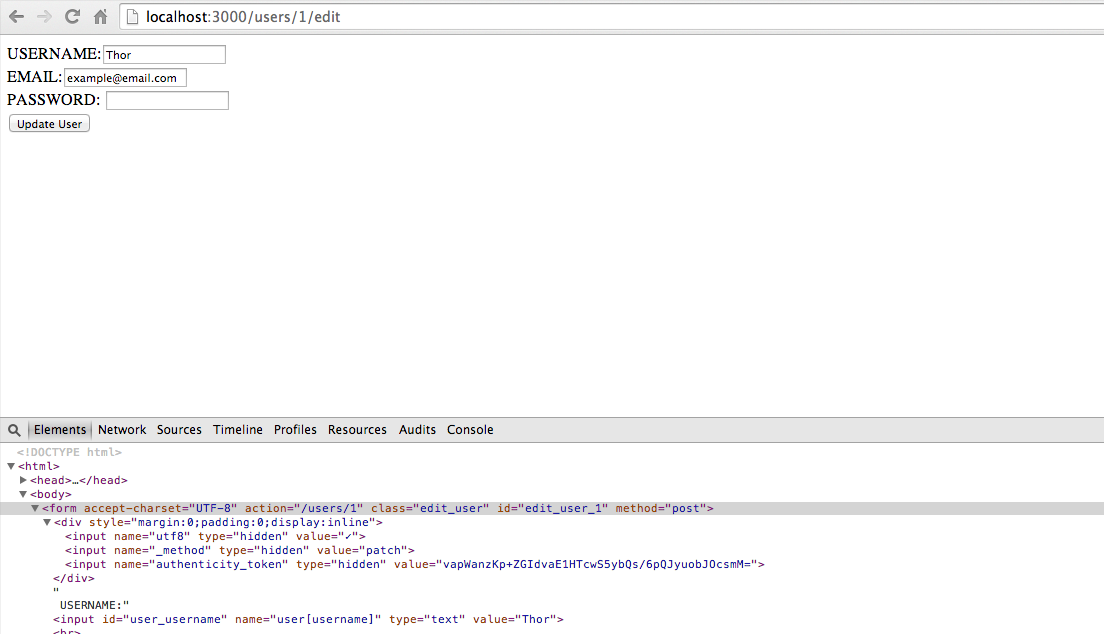
You should see authentication token and other relevant hidden fields.
Confirm that you can submit data and that validations are working.
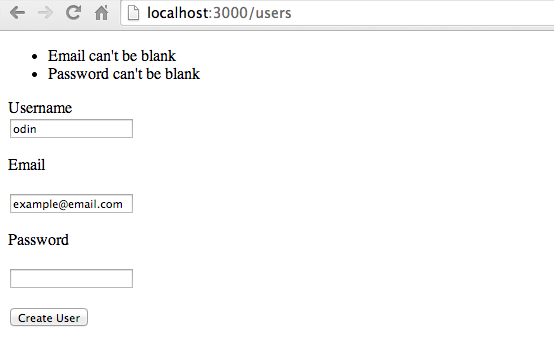
In app/views/users/new.html.erb and app/views/users/edit.html.erb, include error messages:
<%= form_for @user do |f| %>
<ul>
  <% @user.errors.full_messages.each do |error| %>
  <li><%= error %></li>
  <% end %>
</ul>
...
Now, when validations fail, errors should display:
Congratulations! You’ve just created basic forms using html and ruby helper methods.